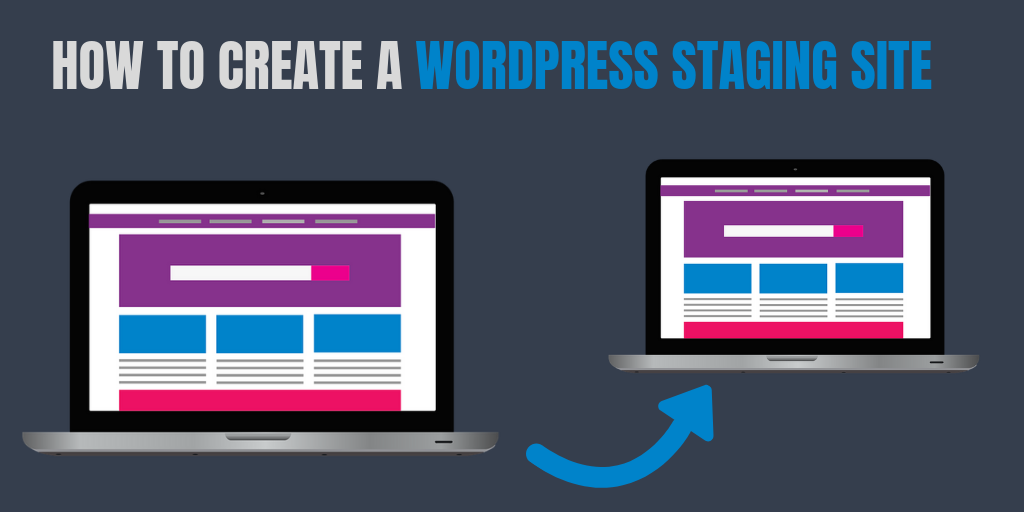
 A WordPress staging site gives you a chance to safely test out changes and updates to your site before you make those changes on your “live” site that’s actually receiving traffic.
It’s a super helpful tool no matter what type of site you’re running. But, there’s one problem…
The WordPress software itself doesn’t offer any staging site functionality. So if you want to create a WordPress staging site, you’ll need some type of third-party solution.
Luckily, that’s what I have for you in this post. I’ll share 4 different ways that you can create a WordPress staging site, including both free and paid options.
Here’s the general order of the solutions:
I’ll start with the easiest, most convenient methods. But, as you might expect, these are also the methods that require you to break open your wallet! After those, I’ll get into some of the free solutions which, as you might also expect, are not quite as convenient.
Let’s get started, beginning with the absolute easiest method…
1. Choose A Host With A Dedicated Staging Site Feature – The Simplest Method
Ok, I know that this method might be a little frustrating because I’m basically telling you to switch hosts if your current host doesn’t offer a staging feature.
But, there’s a reason that I’m still putting this method first:
Having your host implement staging at a server level is just plain the most convenient method of creating a staging site that you’ll find. And while you can certainly find other solutions that work, none of them are as elegant or pain-free.
For example, here’s how easy it is to move between your live site and staging site at WP Engine:
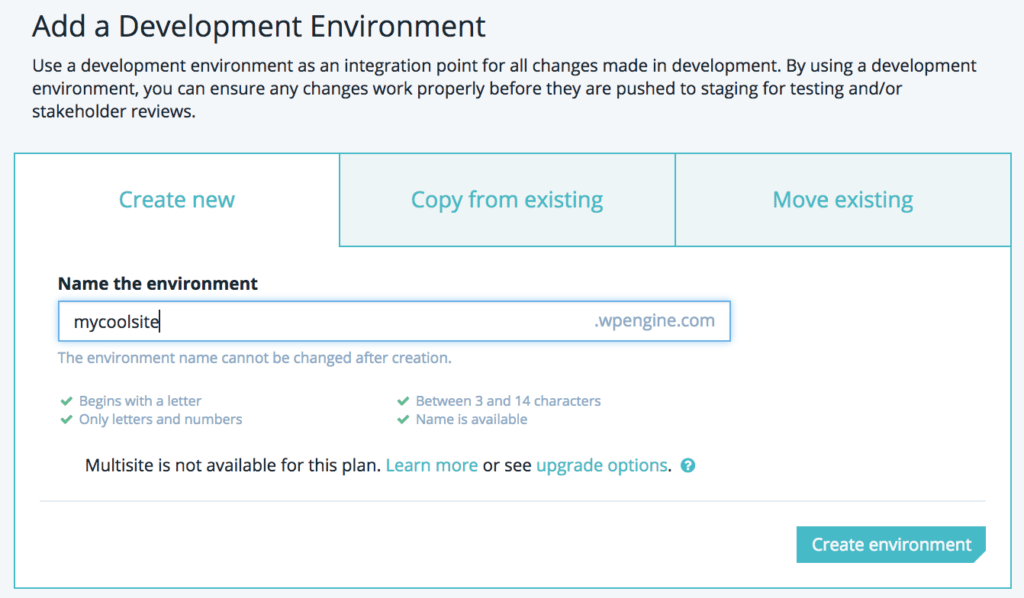
WP Engine allows you to create both a staging and development site. Simply select “copy from existing”, name the environment and your in business!
So, if you can swing it, moving to a host with staging is really the best overall solution.
Next question – which hosts offer staging?
Well, nowadays many WordPress hosting companies offer staging functionality, and some shared hosts are also getting in on the action. Good places to look are:
- WP Engine (has an Australian data center in Sydney and a local support team)
- Kinsta (has an Australian data center in Sydney via Google Cloud Platform)
- WP Hosting (an Australian managed WordPress host with staging on the Business tier and up)
- SiteGround (on the highest tier)
With most of these hosts, moving your site from staging to live is as simple as clicking a button. A good host will also automatically back up your site so that you can roll back the change if needed.
2. Use The Paid, Hosted WP Stagecoach Service – Still Pretty Simple
If your host doesn’t offer a dedicated staging service, the next most convenient method is via a paid service called WP Stagecoach. Essentially, WP Stagecoach creates a separate hosted version of your site to act as the staging site.
You can move your site between staging and live (and vice versa) with a single click.
Here’s the big advantage of WP Stagecoach, though:
You don’t have to overwrite your site’s database when you move from staging to live. Instead, you can opt to merge your site’s database.
If you’re not a power user, I realize that might not make sense right away. Here’s why that’s important:
All of the content on your WordPress site is stored in the database. A blog post is stored in the database, WooCommerce orders are stored in the database, etc.
That means if you:
- Create a staging site on Monday
- Publish a new blog post on your live site on Tuesday
- Move your site from staging to live on Wednesday
Then your blog post from Tuesday would disappear because it wasn’t a part of the staging site…if you couldn’t merge databases.
Using WP Stagecoach is quite simple thanks to the dedicated plugin. Once you configure a few basic settings to authorize the plugin to connect to your WP Stagecoach account, you can create a new staging site with the click of a button:
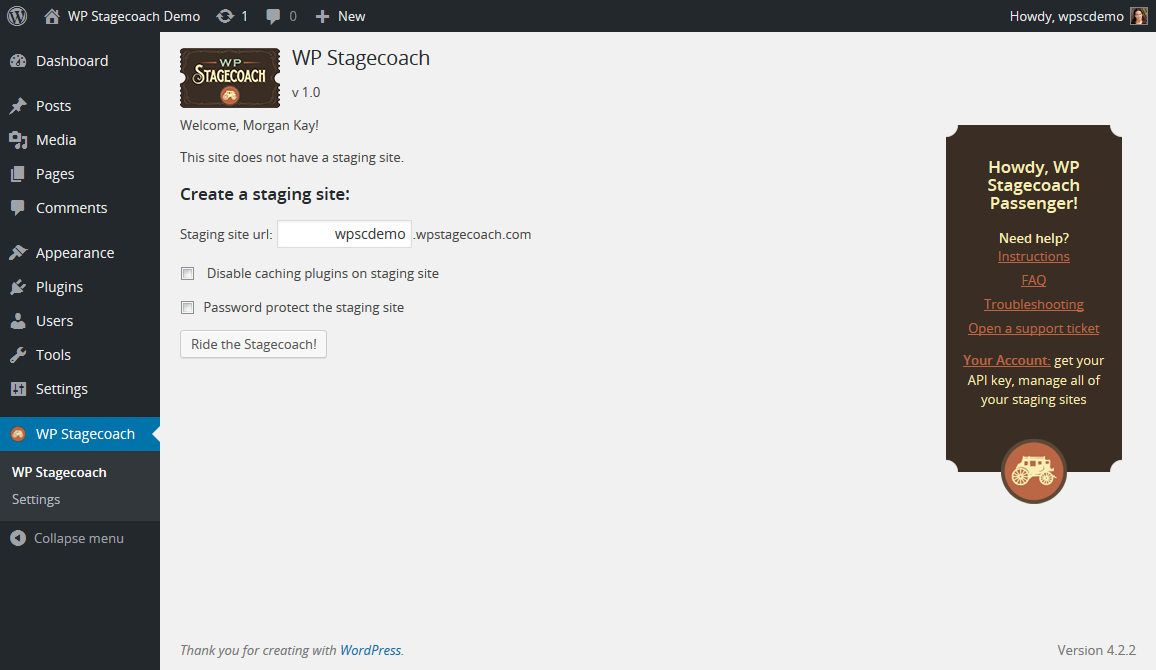
Unfortunately, there’s no free version. The paid plans start at $10 per month (paid annually).
3. Use A WordPress Staging Plugin To Create A Self-Hosted Staging Site – Fairly Simple
With WP Stagecoach, your staging site is hosted on WP Stagecoach’s servers, not your own.
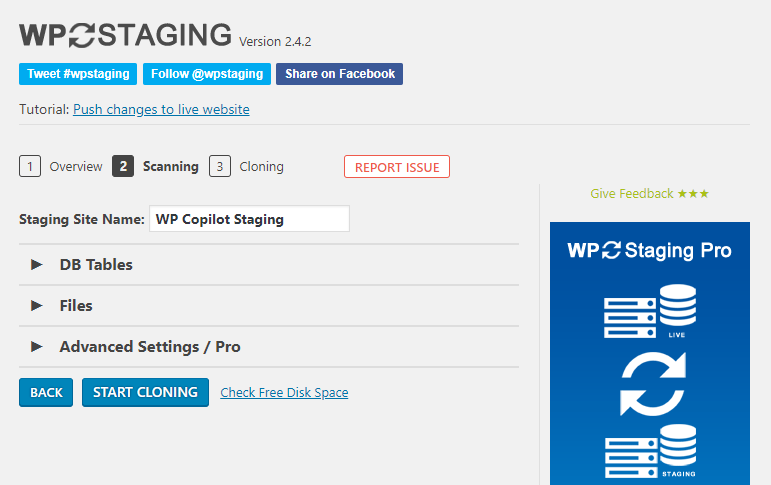
The freemium WP Staging plugin takes the opposite approach, letting you create your own self-hosted staging site.
With a few clicks of a button, you can create a new staging site:
Then, you’ll be able to access your staging site in a subfolder, along with plenty of reminders that you’re working on a staging site:
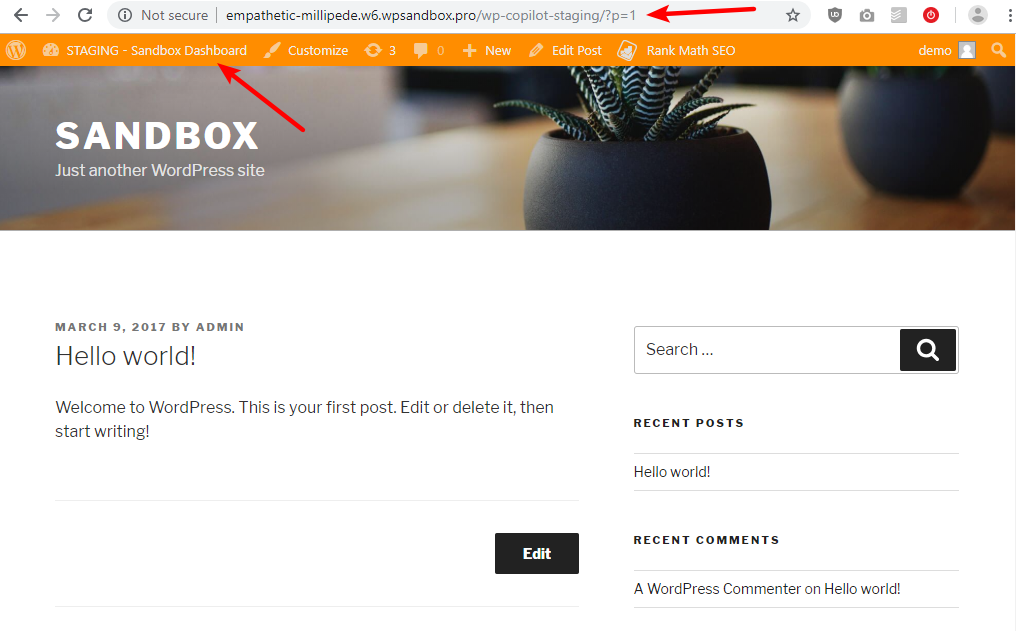
And don’t worry – unauthorized users or search engines won’t be able to access the staging site, so everything remains private.
There is a free version of this plugin at WordPress.org. But it’s important to recognize the limitations of the free plugin:
With the free version, you cannot push changes from your staging site to your live site.
It’s still beneficial because it lets you safely test updates and new plugins. But if you want to actually make changes to your site and then make those changes live, you will need to pay for the premium version, which starts at $100.
With that premium version, you’re able to choose exactly which database tables and files to move from staging to live, which helps you avoid overwriting new live content (though it is a little more technical).
4. Manually Create Your Own Staging Site – Requires Some Knowledge
Finally, it’s also not that difficult to manually create your own WordPress staging site. The main benefit here is that these methods are 100% free.
Basically, you’ll want to set up a new subdomain at your site – something like “staging.yoursite.com” is a good idea.
Then, you’ll need to duplicate the live version of your site to that subdomain.
To do this, you can either…
Method 1: Use A Migration Plugin
All-in-One WP Migration and Duplicator are two free plugins that help you migrate your WordPress site.
They aren’t built specifically to create a WordPress staging site, but they do exactly what you need.
I’ll give you a quick tutorial for how to create a staging site with All-in-One WP Migration, but the general principles are the same for Duplicator.
To get started, install and activate the plugin at the live version of your site. Then, go to All-in-One WP Migration → Export. Choose Export to → File:
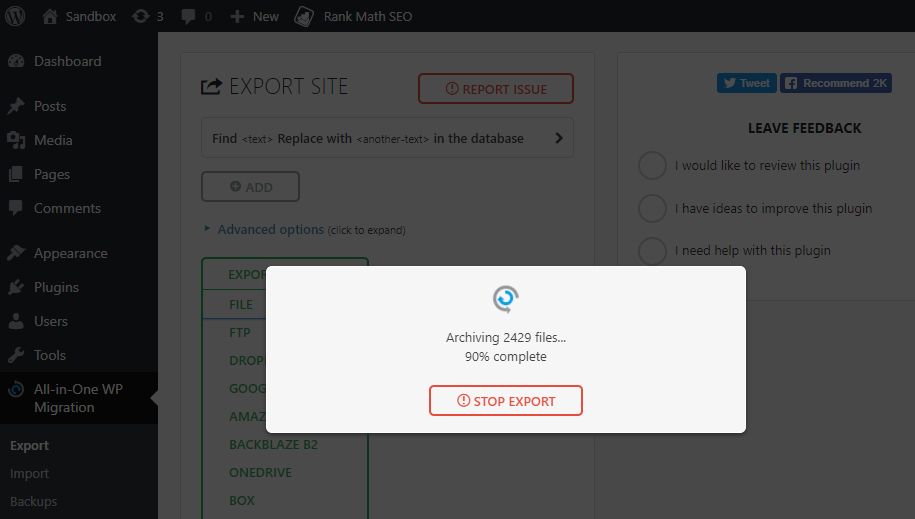
Once the export process finishes, the plugin will give you a .wpress file that contains your entire site.
Then:
- Install a blank version of WordPress at your staging subdomain (You can use your host’s autoinstaller to speed things up)
- Install the All-in-One WP Migration plugin on your blank staging site
- Go to All-in-One WP Migration → Import on your staging site
- Choose Import from → File and upload the .wpress file from when you exported your live site
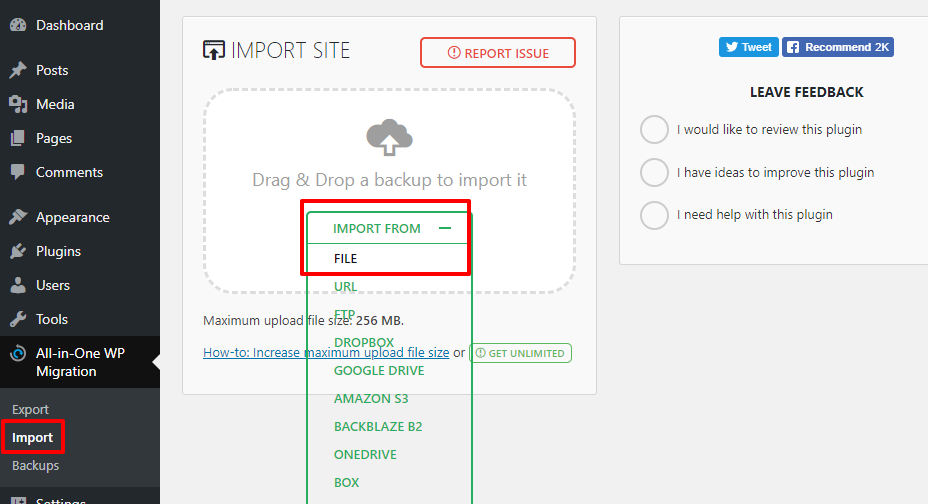
Once the import process finishes, you should get a success message along with instructions to save your permalink structure (just go to Settings → Permalinks and click Save).
Now, you have an identical copy of your live site on your staging subdomain.
From there, you can make the desired changes to your staging site or test out a new update.
If you want to push your staging site live, you just reverse the process (export from staging site → import to live site). Make sure you backup your live site before you do this, though, as you will overwrite all of your site’s files.
Method 2: Move The Files And Database Yourself
Rather than using a plugin like All-in-One WP Migration, another way is to manually move your site’s files and database by yourself.
I would not recommend this method to beginners. As such, I’ll only provide high-level instructions.
Essentially, you’ll need to:
- Copy the files from your live site to your staging site.
- Export your database from the live site. Use the WP Migrate DB plugin as it will let you change all the URLs to point to your staging site.
- Import your database to a new, empty database
- Edit the wp-config.php file for the staging site to point to that new database
Make Sure That Your Staging Site Is Private
When you use a dedicated staging solution, that solution will automatically make your staging site private.
However, with the manual method, your staging site will be open to both humans and search engines by default.
To fix that, first go to Settings → Reading and choose the box for Discourage search engines from indexing this site. This will tell search engines not to index your site:
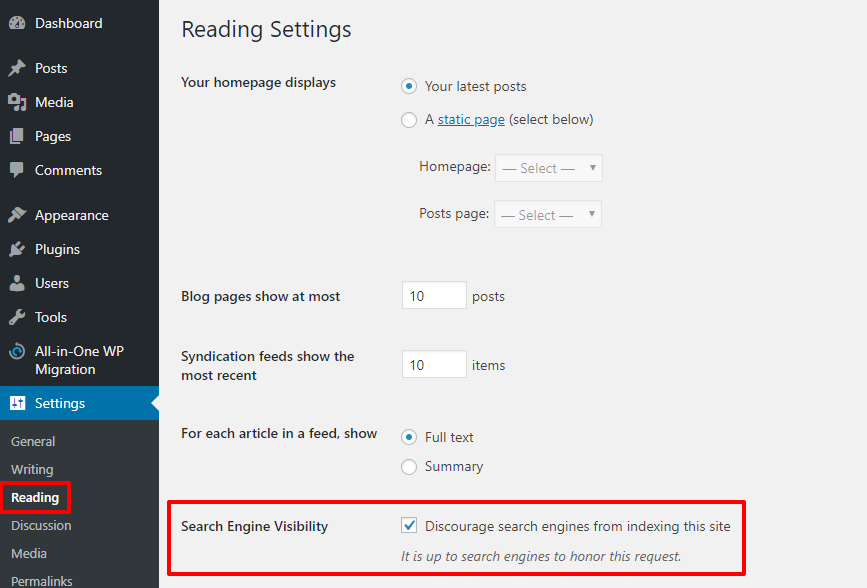
Then, to prevent humans from accessing your staging site, you can use a free plugin like Hide My Site. Or, if you know your way around the .htaccess file, you can restrict access by IP address or set up an htpasswd file.
Create A WordPress Staging Site Today
No matter what your budget or knowledge level is, you should now have what you need to create a WordPress staging site.
If you want the most convenient implementation, moving to a managed WordPress host with staging functionality is always going to be the simplest option.
The WP Stagecoach service and WP-Staging plugin are also beginner-friendly, but they aren’t quite as simple. Beyond where your staging site is hosted, another difference between these two solutions is that WP Stagecoach is paid no matter what, while WP-Staging is free as long as you’re ok with not being able to move files from staging → live.
Finally, the manual methods won’t cost you a penny, but they will require some technical knowledge, and they also require more of a time investment.
Finally, if all this talk of “staging” is confusing to you, why not get some friendly assistance? Our professional Australian WordPress developers can get you setup with a staging site and any other WordPress tasks.
